Table Alignment
You can use attributes to define where in a table cell you want the content to favor (i.e. top, bottom, left and right).
There are also attributes that 'pad' the content called cell padding and cell spacing.
What are Tables?
 Tables are little boxes that divide content into sections. You can use attributes to size and color boxes and even add borders. It is even easy to organize a page using Tables, with so many attributes it's easy to create a unique look.
See the following sections to see how to add and modify these Tables to your page.
-Tables as a Layout
-Table Backgrounds
-Table Border Colors
-Table Alignment
-Table Spanning
It's not hard after you've learned how to make changes to the Tables Tags, to start on the First Lesson, Click Here.
Image Tags
There are some tags that don't have a closing tag. This is one of them. The Image Tag is how you display an image on your page. In the tag you can use attributes to define how the Image will look in the document. You can even use an image to make a link, for more information on this topic, click here.
The Image Tag looks like this:
<img src="http://www.photourlhere.com/">
Then of course there are the attributes to define the image:
width="200" This attribute would make the image 200 pixels wide on the document.
height="200" This changes the height, also measured in pixels.
border="1" This defines the outline around the Image, to set to no border, simply use the number 0.
If you don't know where to go to get the Image Address or URL, Click Here to see a demonstration.
Using an Image as a Link
In order to to use an Image as a Link, you must wrap the Image Tags with Hyperlink Tags which look like this:
<a href="http://www.linkaddress.com"> and of course </a> is the closing Tag defining how much content to make clickable.
Place the Image Tags in between the Hyperlink Tags like this:
<a href="http://www.linkaddress.com">
<img src="http://www.photourlhere.com/">
</a>
To see a list of the Image Tag Attributes, Click Here.
If you don't know where to go to get the Image Address or URL, Click Here to see a demonstration.
Obtaining a Photos Address or URL
We are going to be using PhotoBucket in this demonstration. So if you don't have a PhotoBucket account this may still give you an idea of what to do to retrieve your image address.
First, Upload the Photo or Image you want to use on your webpage.
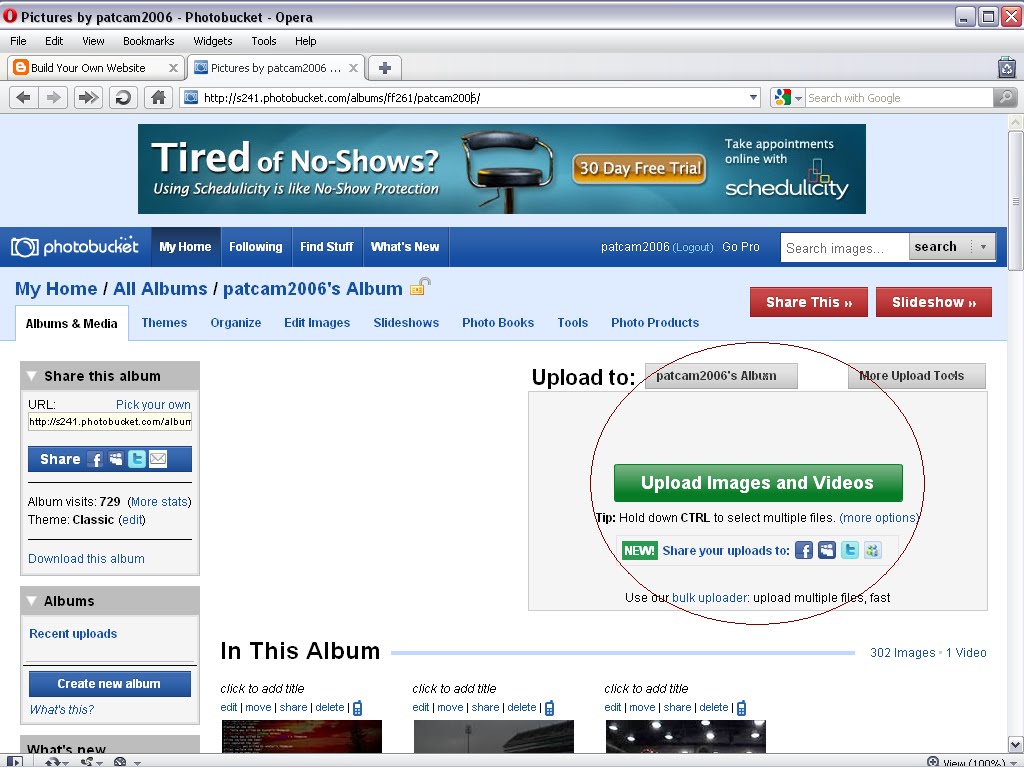
When you finish Uploading the photo/image, get the address as provided with the file:

The URL should look like a web address - http://www.photourls.com/pic1.jpg
This is the address to enter into the Image Tag. Click Here to learn how to use the Image Address in an Image Tag.
BODY Tags and Attributes
The BODY Tag can have several attributes within the tag, these all go in the opening tag, there is nothing to change in the closing tag, it remains as before. An attribute for the body tag would look like this:
<body bgcolor="white">
<body bgcolor="white">
This attribute would change the background color to solid white, here are some more attributes that can be used to set the base for the entire document:
background="http://www.photoaddress.com/" this attribute can be used to make an image the background of your page. You must have a Photo Hosting Account somewhere to upload the photos to the internet and obtain the photo's address on the web. A photo hosting account basically takes image files you have on your computer and makes them a document on the internet. After they are on the internet, you can link to that document and embed them into your page. For more on this, Click Here.
text="black" Would make the default text color in the document black.
link="blue" Makes all Links default color blue, this changes after the viewer has visited the link.
vlink="navy" Makes the pages that the viewer has already visited navy. This color remains navy until the viewer clears their browsers History.
alink="red" if the viewer clicks Back, when they return to your page the Link they clicked on will be highlighted red.
Always remember to use the close BODY Tag at the bottom of the script.
Example Script:
<html>
<head>
<title>
Your Page Name Here
</title>
</head>
</body bgcolor="white" text="black" link="blue">
</font size="2" color="orange"> My First Page! </font>
</body>
</html>
Using Text as a Link
You can make a link that when clicked takes the user to another webpage. Hyperlinking is as easy as adding a tag to define where to direct the user to when they click on a link. A hyperlink tag looks like this:
<a href="http://www.webpagehere.com/"> this would go in front of the text you were making clickable, in the parenthesis is the address of the website you are linking to (Home Page, Facebook, etc.).
</a> follows the text that you are making a link. This defines to the browser how much text to use as the link.
You can use the <FONT> Tags on the text you are linking, just put the tags inside the to Hyperlink Tags:
<a href="http://www.webpagehere.com"> <font size="2" color="#ffffff" face="verdana"> Text Link Here </font> </a>
Example Script:
<html>
<head>
<title>
Your Page Name Here
</title>
</head>
</body bgcolor="white">
<a href="http://www.address.com/"> </font size="2" color="orange"> View by Clicking NOW! </font> </a>
</body>
</html>
Table of Contents - Site Map
A basic overview of this Guides Mission and what to expect from the content.
Explaining the HTML Tags and getting acquainted with the most basic Tags.
Explains the need for an editor and example of a Classic Template Editor on Blogger.com.
Explains how to use the FONT Tags in a script
Explains how to create a Link using basic Text
Explains the Image Tags and how to use them.
Explains how to create a Link using an Image or Picture.
Basic functions of common attributes and how to place them in Tags.
Explains how to use the Heading Tags to create a Title or Header.
Explains how to create a List, i.e. grocery list, to-do list, etc.
Explains how to use Paragraph Tags to align text left, right, etc.
Explains how to use the Bold, Italic, Underline, Strikeout and Blink Tags.
Explains how to use the Center Tags
Explains how to scroll text and more across a Browser screen using Marquee Tags.
How to use Paragraph spacing and decorative lines.
A collection of funny letters I have ran across, i.e. Copyright and Trademark Symbols.
....More Pending.
Introduction
 Welcome to HTMLwebsites.blogpot.com, a guide to start a Webpage from scratch. Using HTML scripts to build a website is an elaborate process. I have spent numerous hours creating tutorials on how to use various scripts to express through code that which you would imagine on the monitor. A lot of the tutorials in this site have links to navigate you to information that may pertain to that section. I tried to stick to a basic color layout and explanations as to not cause confusion. Please feel free to wander around through these pages. I will try to add more advanced scripts and commands as the site matures, so check back often. Also, I plan to venture into explaining certain add-on type applications such as Facebook for Your Webpage and Playlists, etc. You can Copy and Paste any of the codes in this guide to customize Your Blog or Website.
Thanks for visiting and come back soon!
Click Here to get started.
Paragraph and Line Breaks
There a few different ways to divide a page with Paragraph and Line Breaks.
<p> and </p> are the Paragraph Tags. These will create space above and below the content within these Tags.
<br/> is a tag all by itself. One of these tags creates a single Line Break. You can use as many as you like to create the amount of space desired between content.
<hr/> This Tag, called the Horizontal Rule will create a paragraph size break in the page content and also create a visible line. Here is an example:
A neat thing about this Tag is that you can adjust the line with attributes, here are a couple:
color="white"
width="200"
Example Script:
<html>
<head>
<title>
Your Page Name Here
</title>
</head>
</body bgcolor="black">
Page Content
<br/>
<p>
Paragraph Content
</p>
Page Content
<hr color="yellow" width="75%"/>
</body>
</html>
Table Tags Explained
The first thing you need to know is how the basic Table is laid out. The Following are the Table Tags in the most basic order:
Funny Letters
I get many searches for: 'funky letters for myspace.' Some people have spent countless hours putting these letters together to make pages worth of information written in pure funky lettering. Here's my collection so far, feel free to Copy and Paste them for your Blog, Myspace, Facebook or Website.
▓▓▓▓▓▓▓▓. ⊙⊙ ☠
◄◄ REW ► PLAY ▌▌PAUSE █▌STOP ►► FF
█████ ◄╞, ş ą ğ ♪
♥♡♥♡ ♥ ☺ ღ ๑ ♠ ۩ ▶Music♩♪♫♬ Volume: ▁ ▂ ▃ ▄ ▅
❒ Yes ❒ No ✔
TO DO: ☑ A bit of tweeting, ☑ Lay around, ☑ Drink beer, ☑ Be Awesome.
There's so many, look.....
€
ƒ
…
†
‡
Œ
•
—
™
š
œ
Ÿ
¡
¢
£
¤
¥
¦
§
¨
©
ª
«
¬
®
¯
°
±
²
³
´
µ
¶
·
¹
º
»
¼
½
¾
¿
À
Á
Â
Ã
Ä
Å
Æ
Ç
È
É
Ê
Ë
Ì
Í
Î
Ï
Ð
Ñ
Ò
Ó
Ô
Õ
Ö
×
Ø
Ù
Ú
Û
Ü
Ý
Þ
ß
à
á
â
ã
ä
å
æ
ç
è
é
ê
ë
ì
í
î
ï
ð
ñ
ò
ó
ô
õ
ö
÷
ø
ù
ú
û
ü
ý
þ
ÿ
To use any of these letters, simply drag a box over the text, right click and copy the letter. Then go to where you want to use the letter, right click and paste.
Ctrl X
- "Cut" remove the selected item but save to clipboard.
Ctrl C
- "Copy" the selected area to the clipboard, without removing.
Ctrl V
- "Paste" the item you saved to the clipboard to the area you are editing.
Frogger
<script src="http://www.gmodules.com/ig/ifr?url=http://www.atlas-labs.net/gadgets/widget/frogger/frogger.xml&synd=open&w=468&h=373&title=Frogger&border=%23ffffff%7C3px%2C1px+solid+%23999999&output=js"></script>
Simply paste this code into the BODY of your Script.
Tetris On Your Page
<script src="http://www.gmodules.com/ig/ifr?url=http://www.atlas-labs.net/gadgets/widget2/arix/arix.xml%3F1&synd=open&w=468&h=368&title=Arix+Tetris&border=%23ffffff%7C3px%2C1px+solid+%23999999&output=js"></script>
Simply paste this code into the BODY of your Webpage.
Bejeweled on Your Page
<script src="http://www.gmodules.com/ig/ifr?url=http://bejeweledg.googlecode.com/svn/trunk/bejeweled.xml&synd=open&w=500&h=370&title=Bejeweled&border=%23ffffff%7C0px%2C1px+solid+%23004488%7C0px%2C1px+solid+%23005599%7C0px%2C1px+solid+%230077BB%7C0px%2C1px+solid+%230088CC&output=js"></script>
Simply Paste this code in the BODY of your Script.
Attribute Reference
The Attributes are the different command parameters we are placing inside a Tag. These do more to render specific results than just the tag alone. Most can be interchanged from Font Tags to Table Tags, so for quick reference, here is a list of common Attributes and their functions:
bgcolor="white" This Attribute can be used in several different Tags to define the background color, i.e. Page Background Color, Table Background Color, etc.
background="http://www.backgroundaddress.com/" This Attribute can be used in several different Tags to define the background image, i.e. Page Background Image, Table Background Image, etc.
border="1" defines a border sometimes used in things like Tables and Images.
bordercolor="blue" would be used with the above attribute to define a color for the Border, if not used the Borders are automatically default white unless otherwise specified somewhere in the Page Script.
height="200" define the height of an element in pixels, such as an Image or a Table.
width="200" define the width of an element in pixels, such as an Image or a Table.
This should give you an idea of how an Attribute define the motives of a Tag. There are many more Attributes that haven't been mentioned here. They will be mentioned in this Guide along with the Tags they can be used with.
Marquee Scrolling Text
Most scrolling text is catchy to the eye, however try not to use too many of these scrollers, they tend to slow the page load time down if used in excess.
Here are the Marquee open and close tags:
<marquee> and </marquee>
So now we've got an idea of what to do to scroll the text, here are some more attributes to change the content of the marquee:
direction="right" Use left, right, up or down to specify which direction to scroll
height="25" Defines the height of the Marquee
width="200" Defines the width to span the Marquee
behavior="alternate" Defines the type of trick the Marquee will use. There is another behavior besides alternate, its "slide" This causes the text to scroll in and stop as if it were sliding. Alternate simply bounces the text back and forth. This attribute is not required to define a direction.
scrolldelay="200" Sets an amount in Micro Seconds to slow the Marquee down.
scrollamount="200" Sets an amount in Micro Seconds to speed the Marquee up.
You can also embed images into a Marquee, simply place the image code between the Marquee tags and specify how you want it to scroll.
Example Script:
<html>
<head>
<title>
Your Page Name Here
</title>
</head>
</body bgcolor="white">
<marquee direction ="left" scrolldelay="200"> Text or Images Here </marquee>
</body>
</html>
Centering Tag
There is a very easy way to get different types of content to Center on a page, this same feature can be used to Center several different objects together. here are the Tags:
<center> and </center> are the open and close Tags for centering content. Everything in between these Tags will all be centered to collectively.
These Tags can be used in various places such as Tables or just the open space area of the document. Also, more than one set of these tags can be used in a single script.
Example Script:
<html>
<head>
<title>
Your Page Name Here
</title>
</head>
</body bgcolor="white">
<center> Page Content </center>
</body>
</html>
Bold, Italics, Etc.
Aside from the various attributes found in the FONT Tags, these tags are inserted between those tags but the text still goes between the Bold, Etc Tags. There are also CSS scripts you can use in place of the conventional methods offered in HTML. We will get to those later in this guide. For now, lets look at the various Tags for this Section:
<b> and </b> are the open and close tags to define specified text to be BOLD
<i> and </i> are the open and close tags to define specified text to be Italic
<u> and </u> are the open and close tags to define specified text to be Underlined
<strike> and </strike> are the open and close tags to define specified text to be Strike Out
<blink> and </blink> are the open and close tags to define specified text to be (doesn't work with all browsers)
Note that these tags should be placed closest to the text you are trying to alter. Here is an example:
<html>
<head>
<title>
Your Page Name Here
</title>
</head>
</body bgcolor="white">
<a href="http://www.linkurlhere.com/"><font size="2"><b> Text Link </b></font></a>
</body>
</html>
Lists
Here is an example of a list layout:
Store List
- Coffee
- Milk
Lists are a simple set of tags. One set of tags opens and closes the List area, while the listed items only need a single Tag to drop down to the next item in the list. There are two kinds of Lists; the first is an unordered list and the second is an ordered list. here are the Tags:
<ul>
<li> Item
<li> Item
<li> Item
</ul>
<ol>
<li> 1. Item
<li> 2. Item
<li> 3. Item
</ol>
Copy and Paste these codes in the BODY area of your Script.
Headings
<h1> and </h1> Tags create a Header. The number controls the size, 1 being the largest and 6 being the smallest.

Example Script:
<html>
<head>
<title>
Your Page Name Here
</title>
</head>
</body bgcolor="white">
<h6>Welcome To My Page.</h6>
</body>
</html>
We're Sorry!
The page you are looking for is currently under construction or is otherwise unavailable. Sorry for the inconvenience, please check back soon...
STILL UNDER CONSTRUCTION
How did you get to this page? Please leave a comment below.
Text Alignment
You use the align="center" attribute in things like Paragraphs and Headers. Here are some other attributes to define alignment:
align="left"
align="right"
valign="top"
valign="middle"
valign="bottom"
The Top, Middle and Bottom or VALIGN attributes are vertical alignments typically used in Table Tags. Here is an example of ALIGN attributes in a Paragraph Area:
<p align="right">
<font size="1"> Content Text </font>
</p>
Contact Us
Feel free to contact us with any Questions or Comments. We are always searching for ways to make this Guide better.
Email: PATCAM2005@gmail.com
Facebook: http://www.facebook.com/pages/PATCAM-Magazine-Internet-Toys-Software-More/276747856580
What is a Form?
Forms as a whole are areas of a Webpage where Users fill out the information you have requested, used check boxes to make indications or even drop down menus to select from multiple choices. You can use parts of the Form however, to make selections or even navigate away from the page. An example would be to use a drop down menu with a list of pages to navigate a site.
Forms that collect information to be sent can send the information given or indicated by the User to an email account or even be sent as a feed to a collective interface. Unfortunately Blogger.com does NOT support the Command Script that is required to export information.
Angelfire.com is a runner up to Blogger for me, and I still go back there from time to time to build web pages. I quit using them because the free service they provide requires that you have annoying pop-up ads and ridiculous sized banners at the top of your page. However, when it comes to ridiculous or nothing, I had to go with ridiculous and make my Form using Angelfire's Web Shell.
To see the basic Form Tags, Click Here.
To see the tutorial using an Angelfire Page, Click Here.
Subscribe to:
Posts (Atom)