Showing posts with label Images. Show all posts

Image Tags

There are some tags that don't have a closing tag. This is one of them. The Image Tag is how you display an image on your page. In the tag you can use attributes to define how the Image will look in the document. You can even use an image to make a link, for more information on this topic, click here

The Image Tag looks like this:

<img src="http://www.photourlhere.com/">

Then of course there are the attributes to define the image:

width="200" This attribute would make the image 200 pixels wide on the document.

height="200" This changes the height, also measured in pixels.

border="1" This defines the outline around the Image, to set to no border, simply use the number 0.


If you don't know where to go to get the Image Address or URL, Click Here to see a demonstration.


Using an Image as a Link

In order to to use an Image as a Link, you must wrap the Image Tags with Hyperlink Tags which look like this:

<a href="http://www.linkaddress.com"> and of course </a> is the closing Tag defining how much content to make clickable.

Place the Image Tags in between the Hyperlink Tags like this:

<a href="http://www.linkaddress.com"> 
<img src="http://www.photourlhere.com/">
</a>

To see a list of the Image Tag Attributes, Click Here.


If you don't know where to go to get the Image Address or URL, Click Here to see a demonstration.

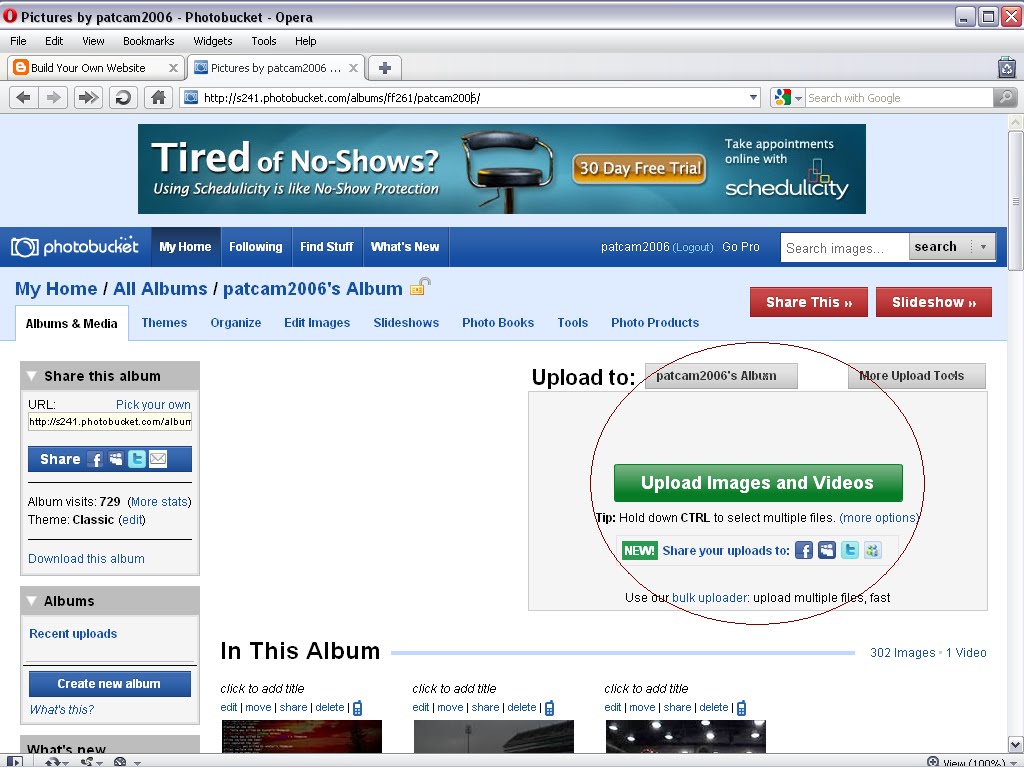
Obtaining a Photos Address or URL

We are going to be using PhotoBucket in this demonstration. So if you don't have a PhotoBucket account this may still give you an idea of what to do to retrieve your image address.

First, Upload the Photo or Image you want to use on your webpage.

When you finish Uploading the photo/image, get the address as provided with the file:

The URL should look like a web address -  http://www.photourls.com/pic1.jpg

This is the address to enter into the Image Tag. Click Here to learn how to use the Image Address in an Image Tag.


Marquee Scrolling Text

Most scrolling text is catchy to the eye, however try not to use too many of these scrollers, they tend to slow the page load time down if used in excess.

Here are the Marquee open and close tags:
<marquee> and </marquee>

This a Marquee with a Background Color, look below for more attributes

So now we've got an idea of what to do to scroll the text, here are some more attributes to change the content of the marquee:

direction="right" Use left, right, up or down to specify which direction to scroll

height="25" Defines the height of the Marquee

width="200" Defines the width to span the Marquee

behavior="alternate" Defines the type of trick the Marquee will use. There is another behavior besides alternate, its "slide" This causes the text to scroll in and stop as if it were sliding. Alternate simply bounces the text back and forth. This attribute is not required to define a direction.

scrolldelay="200" Sets an amount in Micro Seconds to slow the Marquee down.

scrollamount="200" Sets an amount in Micro Seconds to speed the Marquee up.

You can also embed images into a Marquee, simply place the image code between the Marquee tags and specify how you want it to scroll.

Example Script:

<html>
<head>
<title>
Your Page Name Here
</title>

</head>
</body bgcolor="white">


 <marquee direction ="left" scrolldelay="200"> Text or Images Here </marquee>
 

</body>
</html>